The Norfolk Island Pine invokes holiday vibes, but this stunner adds greenery and texture to your home all year. The name contains a clue about where this tree calls home. Norfolk Island, an Australian territory in the Pacific Ocean, is the native habitat of the Norfolk Island Pine. Norfolk Island is a fascinating place regarding plant life, with 40 plants only found naturally on the island. The name Norfolk Island Pine also contains some deception because this plant is not an actual pine tree. The Norfolk Island Pine, or Araucaria heterophylla, is a tropical, cone-bearing plant that existed before pines. This is an ancient species of plant that looks similar to pine trees and is easy to maintain. Here’s what you need to know about Norfolk Island Pine care.
Appearance
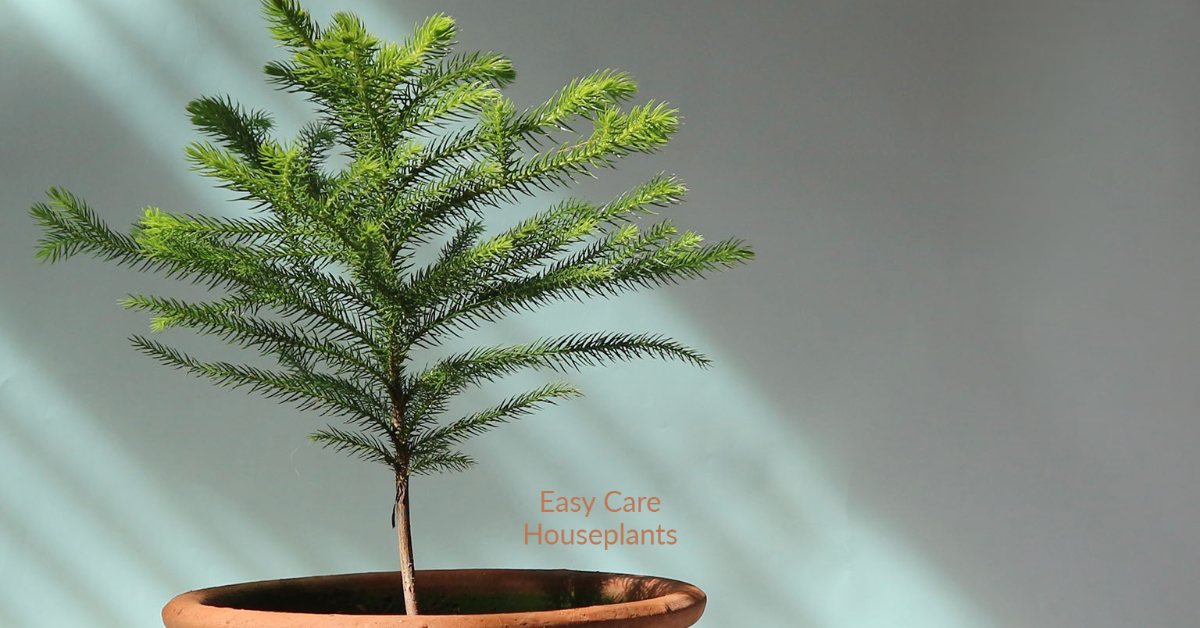
In nature, Norfolk Island Pines can reach 100 feet tall. As a houseplant, most stand a few feet tall, although, with excellent Norfolk Island Pine care, these trees can reach 20 feet tall indoors. Norfolk Island Pines have branches that grow from a central trunk. Most plants available for sale will feature several trunks. As long as the container is big enough and has good drainage, it’s best to leave the plant as is and keep all of the trunks together in one container.
The tiered branches are symmetrical and feature short needle-like foliage that grows on all parts of the branch. New foliage is bright green before transitioning into a medium-green hue. The foliage of mature plants resembles scales, giving the plant a unique look.

Norfolk Island Pine Light Needs
Place a Norfolk Island Pine in medium to bright indirect sunlight. This beauty can handle some direct light, but only a few hours per day. A South- or West-facing window is a good home for Norfolk Island Pines. This is a slow-growing plant; plants grown in low light will grow more slowly than in bright sunlight.
How Often to Water Norfolk Island Pine
Most people think tropical plants have high water needs, but that’s not true for Norfolk Island Pine. Their laidback water needs are part of what makes them so easy to maintain. Norfolk Island Pine care requires waiting until the soil is dry throughout the container before watering. Factors like humidity and sunlight impact how quickly the soil will dry out, but the plant generally needs water every 1 to 2 weeks.
Best Soil for Norfolk Island Pine
Norfolk Island Pine prefers rich, acidic, well-drained soil. Potting mixes with high peat content are a good choice because the pH will lower as the peat breaks down.
Temperature for Norfolk Island Pine
Norfolk Island Pine care should replicate what the plant would experience in nature to a degree. These are tropical trees, so they like warm temperatures. Most homes are kept at a comfortable temperature for Norfolk Island Pine. Anything between 65° and 85° F is good. A Norfolk Island Pine makes a lovely addition to a patio or porch during the warmer months, but wait until the temperature is above 60° F before moving your plant outdoors.

Norfolk Island Pine Humidity
Average humidity is alright for Norfolk Island Pines, but these tropical trees are completely content in increased humidity. Extra dampness in the air keeps these plants lush and growing and provides next-level Norfolk Island Pine care. Place the tree in a naturally humid area, like a kitchen or bathroom, and consider preemptively increasing the humidity if your home tends to be dry during the winter. Low humidity is a dealbreaker; the foliage will dry out and turn brown if the conditions are too dry.
Norfolk Island Pine Fertilizer
Fertilizing is a great way to support new growth and give your plant a nutritional boost. Apply a water-soluble balanced fertilizer monthly during the growing season. Norfolk Island Pine plants do not need to be fertilized when dormant.
Pruning Norfolk Island Pine
Remove dead or damaged branches as needed. Lower limbs typically die as the plant grows, creating a more classic tree look. Remove lower branches to keep the Norfolk Island Pine looking good and direct energy into new growth.
Avoid trimming the top of the tree. The top of the trunk is known as a central leader, and this is the part that continues to grow taller. Trimming the central leader stops all upward growth and encourages the branches to grow bigger and fuller. You can trim the central leader if the tree has reached the tallest height possible for your space and you want to prevent the plant from growing taller.

When to Repot Norfolk Island Pine
Repot rootbound plants. Roots peaking through the drainage holes indicate the Norfolk Island Pine needs a new pot. Plan to repot every other year, as these are slow-growing houseplants. When repotting, select a pot that is one to two inches larger and has drainage.
Norfolk Island Pine Propagation
Propagating Norfolk Island Pines is possible, but you should consider buying a new plant to expand your collection. You can propagate Norfolk Island Pines via cuttings or division.
Cuttings
Propagated branches will continue to grow as branches — they will not take on a tree-like appearance. You need to propagate the central leader if you want to propagate a plant that will look like a tree. If you have a Norfolk Island Pine that perfectly fits your space and you don’t want it to grow taller, trimming the central leader is fine. Do not trim the central leader if you want the mother plant to continue to grow taller.
If you still want to go forward with propagating your Norfolk Island Pine, use clean, sharp shears to take a cutting. Place the cut end in soil, and move the pot to a terrarium or tent the container with a plastic bag or plastic wrap. The terrarium or tent keeps the cutting warm and allows humidity to build up, which helps new plants develop. Keep the soil moist but not soggy.
Division
Most commercial growers include multiple Norfolk Island Pines in a pot. The benefit of this tactic is you end up with a very full and lush potted plant. You can divide these plants, but it may not be worthwhile. The roots of these plants are usually closely intertwined, so untangling the roots can be challenging, and it’s easy to damage the roots, killing a plant.
Once you separate the trees and repot them in their own pots, they won’t have the full look most people associate with Norfolk Island Pines. We’re used to seeing several trees together, which creates a very dense and full look. Individual trees appear thin and sparse by comparison. Dividing Norfolk Island Pines can be tricky, but consider what you want the plant to look like when you’re done before deciding to separate them.
Is Norfolk Island Pine Pet Friendly?
Norfolk Island Pines are not pet friendly. This plant is mildly toxic to cats and dogs, so while not fatal, it can cause your furry friend to fall ill. Keep this potted plant away from pets, especially if your animals are prone to investigating houseplants.

Norfolk Island Pine Styling Tips
This tree definitely simplifies decorating for the holidays, but Norfolk Island Pine has so much style to offer throughout the year. Norfolk Island Pines are charming trees that add color to a corner or anchor a console table or desk. Houseplants can reach several feet tall (or more with proper Norfolk Island Pine care), making them excellent floor plants. Place your tree in a plant stand to heighten smaller plants, making it easier to admire the branches and foliage.
Norfolk Island Pine Care Tips
Like most houseplants, Norfolk Island Pine needs a good location, and once you find the right spot in your home, this low-maintenance plant is very hands-off. Norfolk Island Pine care is easy and allows you to introduce texture and color into your home.